If you are keen on installing a BLTouch sensor for your 3D printer to never ever again have to do manual levelling in the future, or easily exchange your bed surface and re-level afterwards automatically, you can find loads of installation instructions for the BLTouch. I actually don’t want to repeat them here, but just share some findings I would have loved to find earlier to make the installation easier. This information applies to installing an Antclabs (original) BLTouch sensor (V3.1) to an Anycubic Mega S printer. It might apply to other installations also, but I can’t tell 🙂
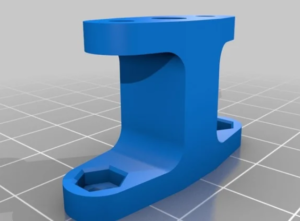
The first thing you’ll be asked to is to download and print this holder from Thingiverse. It will neatly hide the sensor within the hotend sled. And probably you do that before you even open the sled and disassemble the fans and so forth, so you have no clue yet what you are printing here, hoping it will do the job.
It doesn’t. It is not big enough to actually put the BLtouch into the right position. The probe has to be sufficiently high above the nozzle when retracted, and sufficiently below it when probing. So then you start researching and read about potentially needing washers or other spacers. And you wonder whether this is actually the correct way of doing it, because it’s just not really clearly explained in the instructions.
So what I used and what is perfectly fine and stable are two M6 nuts (which are 4.55mm in height). You can put them as spacers between the holder and BLTouch and then it’s located at the perfect height.
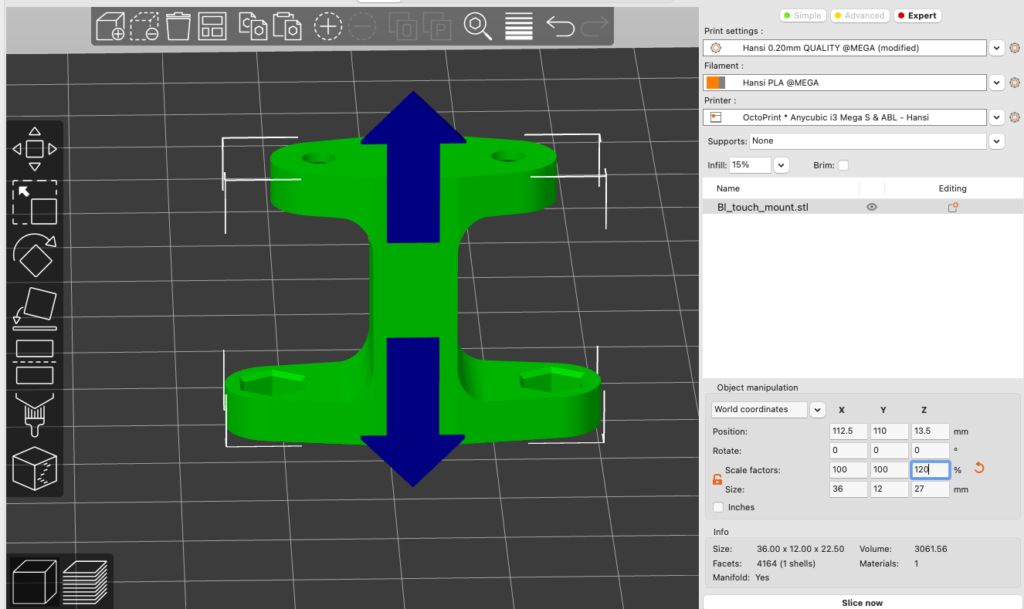
If, however, I had the slightest idea before that it does not fit at all (and what height would be right), I just had printed it at 120% z-scale in the slicer in the first place. This would produce the perfect holder for this combination and does not require any additional spacers then.
Resources

Since Thingiverse is currently…